Check out the fantastic viewing tools in AutoCAD 2009.
Quick View Layouts
The new Quick View Layouts tool on the status bar displays a row of layout images. This visual display makes it easier to navigate to the correct layout. Too many layouts to fit on your screen? No problem—just move your cursor past the edge of the image strip to view additional layouts.
Tip: Right-clicking any layout displays the standard shortcut menu with a fabulous new Export Layout to Model option.
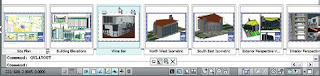
Tip: Use the Quick View control panel to close and publish all layouts, create a new layout, or pin your Quick View Layouts on the screen until you decide to close them.

Tip: Use the icons in the upper corners of each Quick View Layout for speedy printing and publishing.
Quick View Drawings
Also located on the status bar, Quick View Drawings displays a row of your open drawings. You also have easy access to the layouts in each of the drawings.
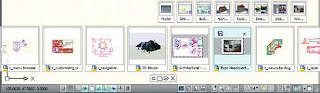
Tip: Use the Ctrl key while rolling the mouse wheel to increase or decrease the size of the drawing preview image.
Use the control panel to pin open the Quick View Drawings images, start a new drawing, open an existing one, or close Quick View Drawings.
Tip: You can quickly save or close a drawing (not just the current drawing) by using the buttons in the upper corners of the drawing image.
ViewCube Feature
Now it is easier than ever to view in 3D. The new CUBE command displays an intuitive 3D navigation cube. This interactive ViewCube™ feature becomes active when you move your cursor over it. Hot spots highlight as you move your cursor around the cube. Click a hot spot to restore the associated view. It is easy to find the ViewCube command on the View panel on the Home tab (3D modeling workspace must be activated).
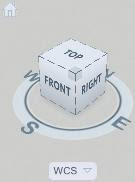
Tip: The ViewCube is available when your drawing is set to any 3D visual style. You can also use the compass ring at the base of the ViewCube to switch between views. Drag any of the letters on the compass ring to rotate the current view in the same plane. Choose between UCS and WCS from the Coordinate System pull-down menu; you can even create a new UCS from this menu.
Tip: Click the house icon on the ViewCube to quickly return to the home view. Just right- click the ViewCube to set the home view.
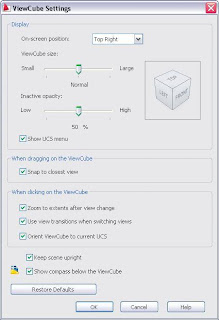
You can control many aspects of the ViewCube from the ViewCube Settings dialog box, available by right-clicking the cube.
SteeringWheels Feature
The new SteeringWheels™ view control makes it easy to navigate both 2D and 3D environments. It also combines many different types of navigation tools into one. You can grab the new SteeringWheels feature from the status bar or by entering the word WHEEL. The SteeringWheels control follows the cursor as you move it so it is always handy.
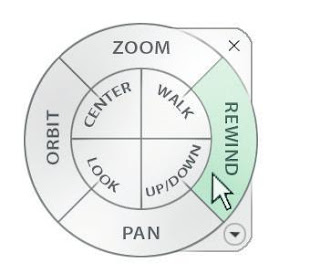
Several SteeringWheels options are available; just pick the one that best suits your current needs. Let’s look at the options available on the full navigation wheel:
• Zoom
• Pan
• Orbit (3D)
• Rewind (a visual zoom previous)
• Center (recenters the view based on the selected point)
• Walk (simulates walking through a model)
• Look (rotates horizontally and vertically around a fixed point)
• Up/Down (slides the current view along the Y axis of the screen)
Tip: Switch to Up/Down by holding down the Shift key (in Walk mode).
Tip: In paper space you only have the ability to zoom, pan, and rewind.
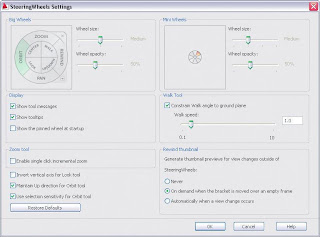
When you get really good at using the SteeringWheels feature, you might decide to try the downsized mini wheels. Mini wheels are much smaller and have tooltips instead of labels.
The SteeringWheels feature offers many options, such as increasing or decreasing the walk speed. These options can be found in the right-click menu or by selecting the down arrow in the lower-right corner. You can control the appearance and settings in the SteeringWheels Settings dialog box.
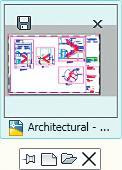
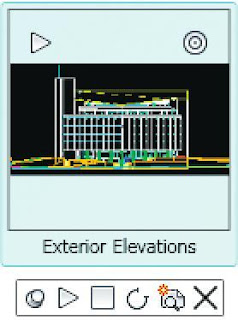
ShowMotion Feature
If you do presentations for your clients, then you will love the new ShowMotion™ feature. ShowMotion tools let you quickly step through different views in your drawing (with different effects) for presentation purposes. The feature can be found on the status bar or by executing the MOTION command. Use the NEWSHOT tool to create new views for your presentation. For organizational purposes you might want to save your views under specific named categories. You can save three types of views: Cinematic, Still, and Recorded Walks. The ShowMotion feature enables you to assign transitions and movements, such as zooming in and orbiting.
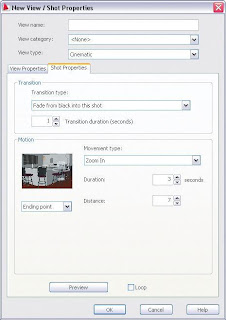
The ShowMotion tool resembles the new Quick View tools. View categories display first with the views assigned to each category. To play through all of the views, click the Play All button in the control panel. Use the Loop option for continuous play. You can close ShowMotion while views are playing so as to not distract from the presentation.
Geographic Location
You can now define the geographic location of a drawing by importing location information from a KML or KMZ file or from the Google Earth™ application. GEOMARKERVISIBILITY controls the visibility of the geographic marker.
No comments:
Post a Comment